

Introduction to DIY Car Detailing
As someone who has a deep passion for cars, I have always found immense satisfaction in ensuring that my vehicle remains in impeccable condition. Throughout the years, I have come to realize that the secret to achieving a truly breathtaking, showroom-ready appearance lies in the art of do-it-yourself (DIY) car detailing.
While it is undeniable that professional auto detailing services can yield impressive outcomes, I have personally discovered that armed with the right tools, high-quality products, and a touch of determination, one can attain a finish that rivals that of a professional right in the comfort of their own driveway. By dedicating some time and effort, anyone can learn how to detail your car and transform their beloved ride into a work of art.
Benefits of DIY Car Detailing
Diving into the world of at home car detailing has truly opened up a whole new realm of satisfaction and financial savings for me. It’s an incredibly rewarding experience to actively participate in the preservation of my cherished vehicle’s beauty and value.
By taking matters into my own hands with diy auto detailing, I have managed to save a substantial amount of money that would have otherwise been spent on professional detailing services. Moreover, there is an undeniable sense of accomplishment that washes over me when I witness the remarkable transformation of my car’s appearance, all thanks to my own efforts and dedication.
This newfound hobby of DIY detailing has not only enhanced my appreciation for my ride but has also allowed me to develop valuable skills in the art of car care.
Essential Tools and Products for Car Detailing
Before we dive into the nitty-gritty of the car detailing steps, let’s talk about the essential tools and products you’ll need to get the job done right. Here’s a comprehensive list to get you started:
- Microfiber Towels: These ultra-soft, lint-free cloths are a must-have for safely and effectively cleaning and polishing your car’s surfaces without scratching.
- Car Wash Mitt: A high-quality wash mitt made of soft, absorbent material will help you gently remove dirt and debris without damaging your paint.
- Car Shampoo: Invest in a premium pH neutral car shampoo formulated to clean your vehicle’s exterior without stripping the protective coatings.
- Clay Bar Kit: Using a clay bar can help remove contaminants and smooth the surface of your paint, preparing it for the next steps in the decontamination process.
- Car Polisher/Buffer: A dual-action polisher or orbital buffer will make the polishing and buffing process much easier and more efficient.
- Car Wax or Sealant: Applying a high-quality car wax or paint sealant will help protect your paint and restore a deep, glossy shine.
- Interior Cleaner: Look for an all-purpose interior cleaner that can tackle everything from upholstery to dashboard and console surfaces during interior detailing.
- Wheel and Tire Cleaner: A dedicated wheel and tire cleaner will help you achieve a spotless, like-new appearance for your wheels and tires during the tire cleaning process.
Preparing Your Car for Detailing
Before you embark on the meticulous process of how to detail a car, it is crucial to take the necessary steps to adequately prepare it.
One of the first things you should do is find a shaded area that offers protection from direct sunlight. This step is essential for two reasons. Firstly, it will prevent the detailing products from drying too quickly, which will allow you to work with them more efficiently. Secondly, it will contribute to achieving a more even and consistent finish on your car’s surface. By ensuring that your car is properly prepared, you are setting the stage for a successful diy car cleaning session.
Once you have found the ideal spot, proceed by giving your car a thorough rinse using either a garden hose or a pressure washer. For an extra foamy wash, consider using a foam cannon. This step is crucial as it will effectively eliminate any loose dirt and debris, thereby minimizing the risk of scratches and swirl marks during the subsequent washing process. By rinsing your car before washing, you ensure that any loose particles are removed, preventing them from scratching the surface of your vehicle. Whether you choose to use a garden hose or a pressure washer, the goal is to thoroughly cleanse the exterior of your car, preparing it for the next step in the washing process.

Exterior Car Detailing Tips
When preparing for a road trip, it is crucial to emphasize the significance of thoroughly detailing your car’s exterior. This not only enhances the overall appearance of your vehicle, but it also serves as a protective measure against the various elements you are bound to encounter during your journey on the open road.
By meticulously attending to the exterior of your car, you are ensuring that its paintwork remains shielded from potential damage caused by weather conditions, debris, and other external factors. Paint protection is a key aspect of exterior detailing.
A thorough exterior detail involves a comprehensive cleaning process that includes washing, waxing, and polishing. By meticulously removing dirt, grime, and any stubborn road debris, this meticulous process not only enhances your car’s appearance but also creates a protective barrier against harmful UV rays and rain.
This ensures that your ride not only looks great but also stays in top condition throughout your journey, providing you with a sense of pride and satisfaction as you cruise down the road.
Follow these car detailing tricks to achieve a high-quality exterior finish:
- Wash the Exterior: Using your car wash mitt and a high-quality car shampoo, gently wash your car’s exterior, working in small sections and rinsing the mitt frequently to prevent scratches. The two-bucket method is a great way to minimize the risk of swirl marks.
- Clay Bar Treatment: After washing, use a clay bar to remove any stubborn contaminants, such as overspray or embedded dirt, from the paint surface.
- Paint Correction: If your car’s paint has any minor scratches, swirl marks, or oxidation, use a car polisher or buffer to gently remove them and restore a smooth, even finish.
- Apply Car Wax or Sealant: Finish off the exterior detailing process by applying a high-quality car wax or sealant, following the manufacturer’s instructions for best results.
Interior Car Detailing Tips
Performing car interior detailing is a meticulous and thorough process that entails a series of steps aimed at cleaning, restoring, and enhancing the overall condition of the vehicle’s interior. This comprehensive service goes above and beyond a regular car wash, as it focuses on the intricate details of the car’s interior components.
From meticulously cleaning and conditioning the upholstery and carpets to restoring the shine of the dashboard and other surfaces, auto interior detailing aims to achieve a pristine and immaculate condition for the vehicle’s interior.
The process of diy car interior detailing typically involves a series of steps aimed at enhancing the overall appearance and longevity of the vehicle’s interior. These steps include vacuuming to remove dirt and debris, steam cleaning to eliminate stains and odors, targeted stain removal techniques to tackle stubborn spots, leather cleaning to condition and protect leather surfaces, and odor removal to freshen up the cabin.
By meticulously attending to these tasks, interior car detailing not only improves the visual and tactile experience for drivers and passengers but also helps to maintain the vehicle’s resale value. So, if you’re looking to give your car a truly amazing look and feel, interior detailing is definitely the way to go!
For a spotless, professionally detailed interior, follow these auto detailing tips:
- Vacuum the Interior: Start by thoroughly vacuuming the carpets, seats, and all other accessible areas of your car’s interior to remove any loose dirt and debris.
- Clean the Upholstery: Use an all-purpose interior cleaner and a soft-bristled brush to gently clean your car’s upholstery, taking care to avoid over-wetting the material.
- Condition the Leather: If your car has leather seats or trim, use a dedicated leather conditioner to keep the material supple and protected.
- Detail the Dash and Consoles: Wipe down the dashboard, center console, and other hard surfaces, including plastic trim, with a microfiber cloth and an all-purpose interior cleaner.
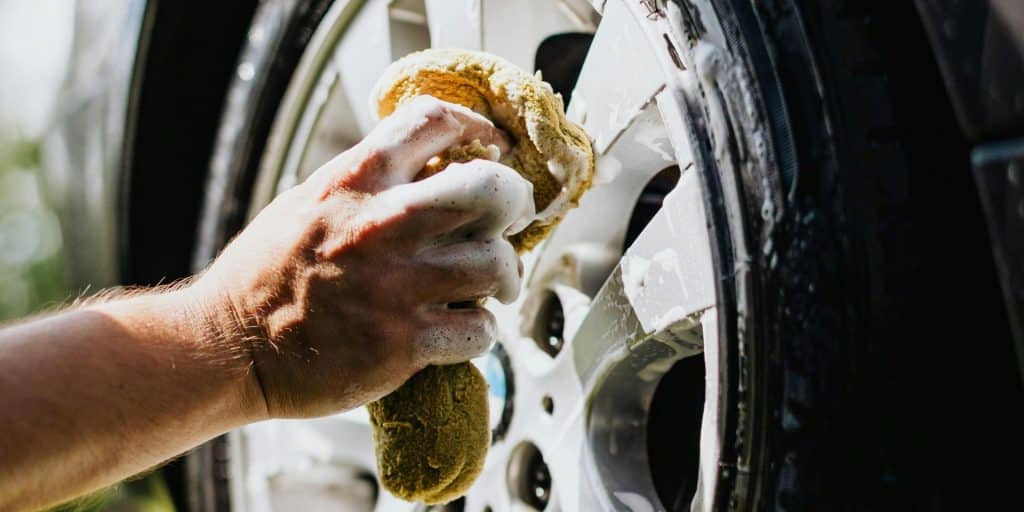
Cleaning and Detailing the Wheels and Tires
When I’m gearing up for a road trip, one of the first things I like to tackle is cleaning and detailing my car’s wheels and tires. It’s not just about aesthetics—though having shiny wheels does make my car look great—it’s also about safety and performance. Clean wheels and tires can improve traction, enhance fuel efficiency, and prolong the life of your tires.
The basic process of cleaning my car’s wheels involves several steps to ensure they are spotless and ready for the road. First, I start by giving the wheels a thorough rinse, making sure to remove any loose dirt or debris. Then, I apply a specialized cleaner that is designed to break down grime and stubborn dirt, ensuring a deep clean. Using a scrub brush, I carefully scrub away any remaining dirt, paying extra attention to hard-to-reach areas. Finally, I apply a tire shine product to give the wheels a glossy finish, adding that perfect touch of style and ensuring they look their best.
This routine not only enhances the appearance of my car but also contributes to its safety on the road. With clean wheels, I can confidently hit the road, knowing that my car is not only stylish but also safe.
Use these 3 simple detailing tips and tricks to achieve tires and wheels that others will envy:
- Wheel Cleaning: Use a dedicated wheel and tire cleaner to thoroughly clean your car’s wheels, making sure to reach all the nooks and crannies.
- Tire Dressing: Apply a tire dressing or protectant to your clean tires to restore a rich, black finish and help protect them from the elements.
- Wheel Polishing: If your wheels have any stubborn brake dust or grime, use a wheel polishing tool or a dedicated wheel cleaner to restore their shine.
Tips for Maintaining a Gleaming Finish
Achieving a professional-level finish through how to detail your own car is just the beginning. To keep your car looking its best, it’s essential to establish a regular maintenance routine and part of your road trip check list. This includes:
- Washing your car at least once a week to prevent dirt and grime buildup
- Applying a fresh coat of wax or sealant every few months to protect the paint
- Regularly clean and condition the interior to preserve the rugs, fabric, and trim.
- Keeping up with wheel and tire maintenance to maintain a clean, polished appearance
- Considering additional treatments like ceramic coating or headlight restoration to further enhance and protect your car’s appearance

Common Mistakes to Avoid in DIY Car Detailing
While how to detail a car at home can be incredibly rewarding, it’s important to be mindful of common mistakes that can undo all your hard work. Some pitfalls to avoid include:
- Using poor-quality or abrasive cleaning tools and products
- Washing in direct sunlight or on a hot surface
- Failing to properly rinse and dry the car between steps
- Neglecting to clean and maintain your detailing tools
- Rushing through the process and skipping important steps
Conclusion: Achieve a Professional Finish with DIY Car Detailing
By following these top car detailing tips and tricks, you can transform your ride into a showroom-worthy masterpiece without breaking the bank or relying on an auto salon or mobile detailing service. With the right tools, products, and a little elbow grease, you can unlock the full potential of your car’s appearance and enjoy the satisfaction of a job well done. So, what are you waiting for? Get out there and start shining up your beloved wheels!
More Road Worthy Reading!